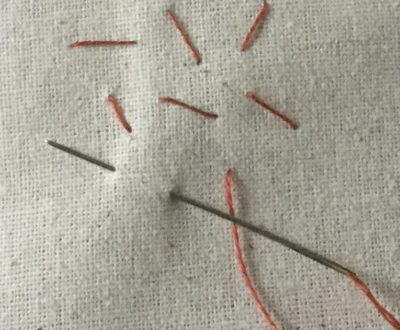
Seed Stitch is one of my favourite and most used embroidery stitches. This tutorial will run you through how-to stitch it and where is can be used to greatest effect in your textile art and embroidery projects. I absolutely love it.
You can see in the photo above, that it is just a simple small stitch that is randomly placed, the main thing is that the stitches are not side by side, or in a line, they are random, so you every time you do a stitch you go in a different direction. It is a very simple embroidery stitch!
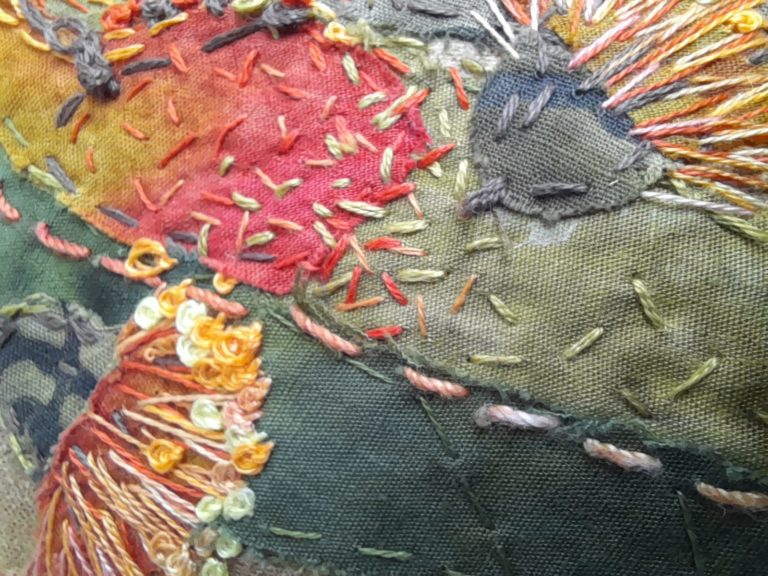
Can you see the patch of orange red colour that is up against the green, this is where I have used the seed stitch. I used a variegated thread, but you coul just use different colours. I used it predominantly to blend the red into the green. The way I did this is to put some of the green stitches on the green but also bleeding through into the red, and doing the same using the red or orange colours to do some stitches on the red but bled it out into the green, this helped to blend the line in between.
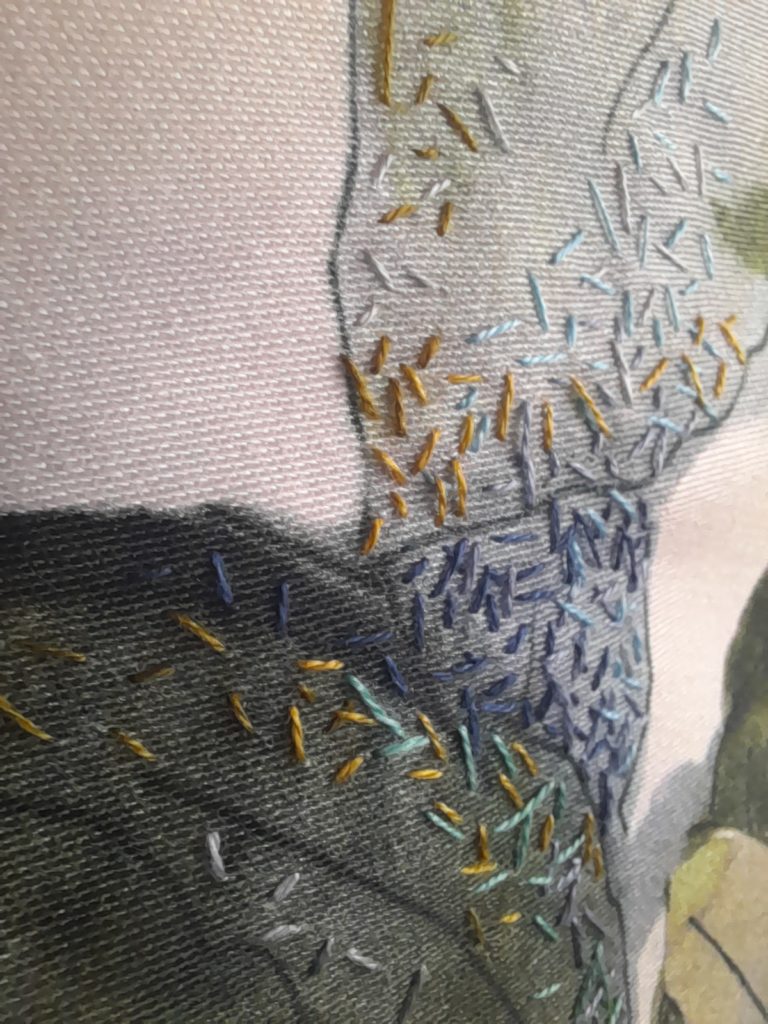
In the above picture I have taken a printed fabric of leaves, it looks like a water colour, but I wanted to add a little to it. I have use dark blue seed stitch in the middle leaf to make is darker and push it into the background. I have used different colours to either add colour, or to add a highlight, or to add depth to a shape, adding darker colours to an edge made it appear to curve away from you.
The link below is so that you can view the video I made on this subject which has alot more detail. This video and more are available to watch on my YouTube Channel.